

Implementing Celery with Django using RabbitMQ
Effortless Asynchronous Task Handling in Django - A Comprehensive Guide


Table of contents
In web development, Django operates synchronous request-response cycle. However, certain tasks such as sending emails, processing large dataset, or handling time-consuming operations, can introduce delays that impact user experience. Let me demystify synchronous and asynchronous process.
Synchronous Process
In synchronous process, tasks are executed one after the other in a sequential order, with each task waiting for the previous one to complete before starting. It follows a "blocking" nature, where each operation blocks the program execution until it is finished. If one operation takes a long time, it can make the entire program unresponsive. Traditional procedural and object oriented programming languages (OOP) follows synchronous execution of program. A simple example is a function call, where the program waits for the function to complete before proceeding.
Asynchronous Process
In asynchronous process, task can be executed independently and concurrently, allowing the program to initiate a task and move on to the next without waiting for the completion. It follows a "non-blocking" nature. Asynchronous programming is commonly used in scenarios like handling multiple network requests and continue processing other task while waiting for responses.
Asynchronous tasks allows Django application to offload time-intensive process to the background, ensuring that users aren't kept waiting for these operations to complete. Imagine a scenario where a user initiates a task like generating reports. Without asynchrony, the request-response cycle might freeze until the task concludes, leading to a poor user experience, as the capacity of the web server hosting the site influences the number of concurrent users it can handle at a time.
By embracing task handling with Celery, developers empower their Django applications to execute such huge operation in the background. This not only enhances user interactivity but also contributes to the overall scalability and responsiveness of the application.
SETTING UP CELERY IN DJANGO
Setting up Celery in Django project involves a series of steps integrate. First, we need to dedicate or make a choice on the message broker. In a typical setup with Django and celery, a message broker serves as the communication middleware between Django, which produces tasks, and Celery, which processes those tasks asynchronously. Let me give a brief overview:
Django Application [Producer]
In Django application, you define tasks that you want to execute asynchronously. These tasks could include background jobs, long-running processes, or any operation that you want to follow.
Celery [Consumer]
Celery worker listen for tasks and execute them asynchronously in the background.
Message Broker [RabbitMQ]
The message broker, such as RabbitMQ or Redis, acts as the intermediary between Django(producer) and Celery(consumer). When a Django application wants to execute an asynchronous task, it sends a message containing information about the task to the message broker. The message broker places the message in a queue, which is a temporary storage for messages. Celery workers continuously monitor the message queue. When a new message(task) arrives in the queue, a Celery worker picks it up for processing. Once the task is completed, Celery may send the result back to Django or store it in a result backend, or a database,
We will make use of the following file structure throughout this guide,
-blog_service
    -accounts
    -blog_service
    -manage.py
-venv

#Expanded
-blog_service
    -accounts        #your django app
        -migrations
        -__init__.py
        -admin.py
        --apps.py
        -models.py
        -tests.py
        -urls.py
        -views.py
    -blog_service
        -__init__.py
        -asgi.py
        -settings.py
        -urls.py
        -wsgi.py
    -manage.py
-venv
Here is a Step-by-step guide configure Celery with Django:
Install Celery:
Activate your virtual environment and install Celery
 C:\Users\AYOMIDE\Documents\Blog>venv\scripts\activate

 (venv) C:\Users\AYOMIDE\Documents\Blog\blog_service>pip install celery[rabbitmq]
Install RabbitMQ:
You need to install the message broker on your machine. The installation process is quite easy for Linux OS and Mac OS, as it can be done through the CLI (Command Line Interface). For window user, here is the link to where, where you can download rabbitMQ installation setup:
Configure Celery:
In the Django project, create a 'celery.py' file in the directory where your settings.py is located, and configure it appropriately:
 #celery.py
 import os
 from celery import Celery

 os.environ.setdefault('DJANGO_SETTINGS_MODULE', 'blog_service.settings')

 app = Celery('src_buyer')

 app.config_from_object('django.conf:settings', namespace='CELERY')

 app.conf.broker_connection_retry_on_startup = True

 app.autodiscover_tasks()
The line "
os.environ.setdefault('DJANGO_SETTING_MODULE', 'blog_service.settings')" sets the value of the environment variable 'DJANGO_SETTINGS_MODULE' if it is not set already. If the variable is already set, it does nothing. This environment variable is used by Django to locate the settings module for a given project, in this case, it's set to 'blog_service.settings'The line "
app = Celery('src_buyer')" is used to create a Celery instance named 'blog_service'. This name is typically the name of the folder that encloses settings.py, which means it is also the name of the Django project. This line enables us to interact with Celery functionalities within the Django project.The line "
app.config_from_object('django.conf:settings', namespace='CELERY')" is used to load configuration settings for Celery from the project's setting.py module. "namespace=CELERY" indicates that the configuration keys loaded from the Django settings module will be prefixed with 'CELERY_'The line "
app.conf.broker_connection_retry_on_startup = True"means that Celery will attempt to connect to the broker if the initial connection fails when starting up. This is mostly the case when dealing with rabbitmq, but the line of code solves the issue.The line "
app.autodiscover_tasks()" instructs Celery to dynamically find and include/register tasks defined using the @shared_task decorator. This ensures that all tasks from your Django project's apps are automatically registered with Celery, saving the stress of listing them.
Here is the new file structure:
-blog_service
    -accounts
    -blog_service
    -manage.py
-venv

#Expanded
-blog_service
    -accounts        #your django app
        -migrations
        -__init__.py
        -admin.py
        --apps.py
        -models.py
        -tests.py
        -urls.py
        -views.py
    -blog_service
        -__init__.py
        -asgi.py
        -celery.py #New file
        -settings.py
        -urls.py
        -wsgi.py
    -manage.py
-venv
Configure Settings.py:
Configure celery in the settings.py file. Recall that the namespace we assign to the Celery instance is 'CELERY', which means the configuration settings will be prefixed with 'CELERY_'.
 #settings.py
 #RabbitMQ as the message broker
 CELERY_BROKER_URL = 'pyamqp://guest:guest@localhost//'

 #Results  backend (optional, but recommended for montoring)
 CELERY_RESULT_BACKEND = 'rpc://'

 CELERY_WORKER_POOL = 'solo'
The line "
CELERY_BROKER_URL = 'pyamqp://guest:guest@localhost//'" defines the URL to connect to the message broker. In this case, it specifies the PyAMQP protocol, with the username 'guest' and the broker running on the local machine.The line "
CELERY_RESULT_BACKEND = 'rpc://'", in this case, it means that the results will be sent back directly to the message broker. Using 'rpc://' as the result backend is suitable for simple scenarios.The line "
CELERY_WORKER_POOL = 'solo'" , the commonly used values are 'prefork', and 'solo'. The default is 'prefork'. The pool is responsible for managing the worker process. solo is a single-process pool, i.e each worker runs in a single instance, which is suitable for development. solo is not suitable for production environments with high task concurrency. prefork is suitable for production environment as it allows multiple worker processes to handle tasks concurrently.Install Flower Package:
To enhance your Celery setup, you can use Flower, a real-time web-based monitoring tool that provides insights into your Celery worker and tasks.
Use 'pip' to install the Flower package:
(venv) C:\Users\AYOMIDE\Documents\Blog\blog_service>pip install flowerCREATING AND EXECUTING TASK
Create your task:
Now that Celery is set up in your Django project, let's see how Celery task can be executed asynchronously. Celery is mainly used to execute tasks that can be time consuming. Let's create a simple task for this article:

Here is the app's models.py where the Abstract User model is overridden, and we also have 'BlogDetail', to store each user blog details. Lets create a task that will create a 'BlogDetail' instance for each User instance when registration is successful.
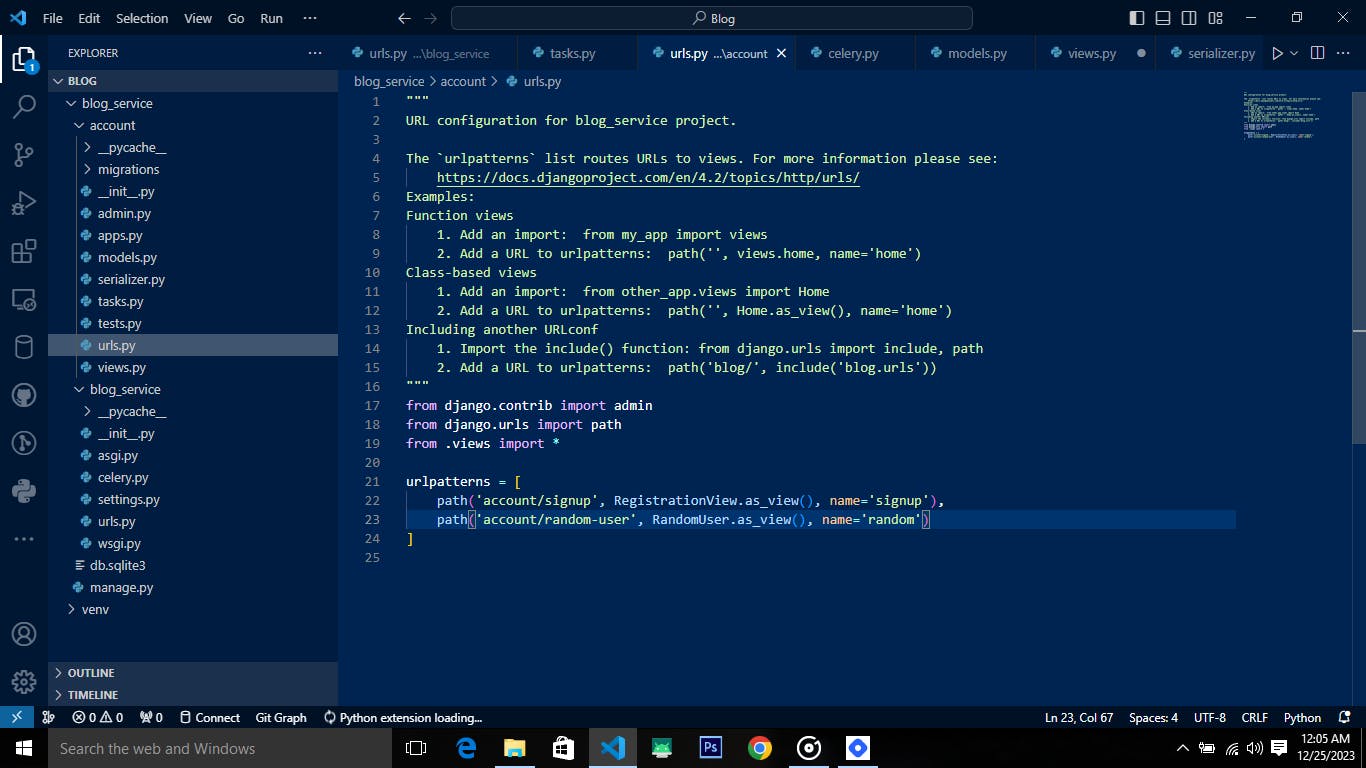
Create a tasks.py file, to define the various asynchronous functions.

@shared taskis applied to function to indicate that it is a Celery task. The decorator transforms the decorated function into a task that can be executed asynchronously by Celery. With this setup, you can call 'create_blog_detail.delay(user_id)' and 'create_random_user.delay(10)' from anywhere in the Django project, and Celery will handle the asynchronous execution of the task. The task is not tied to a specific app, making it shareable and reusable across different parts of the project.Let's create endpoints that calls these celery tasks.


Now we have endpoints that calls these tasks, let's startup celery worker to handle the task:
Open a command prompt tab and start your Django server:
  C:\Users\AYOMIDE\Documents\Blog>venv\scripts\activate

  (venv) C:\Users\AYOMIDE\Documents\Blog>cd blog_service

  (venv) C:\Users\AYOMIDE\Documents\Blog\blog_service>python manage.py runserver
Open another command prompt tab and start the Celery worker. To start the Celery worker, you need to activate venv:
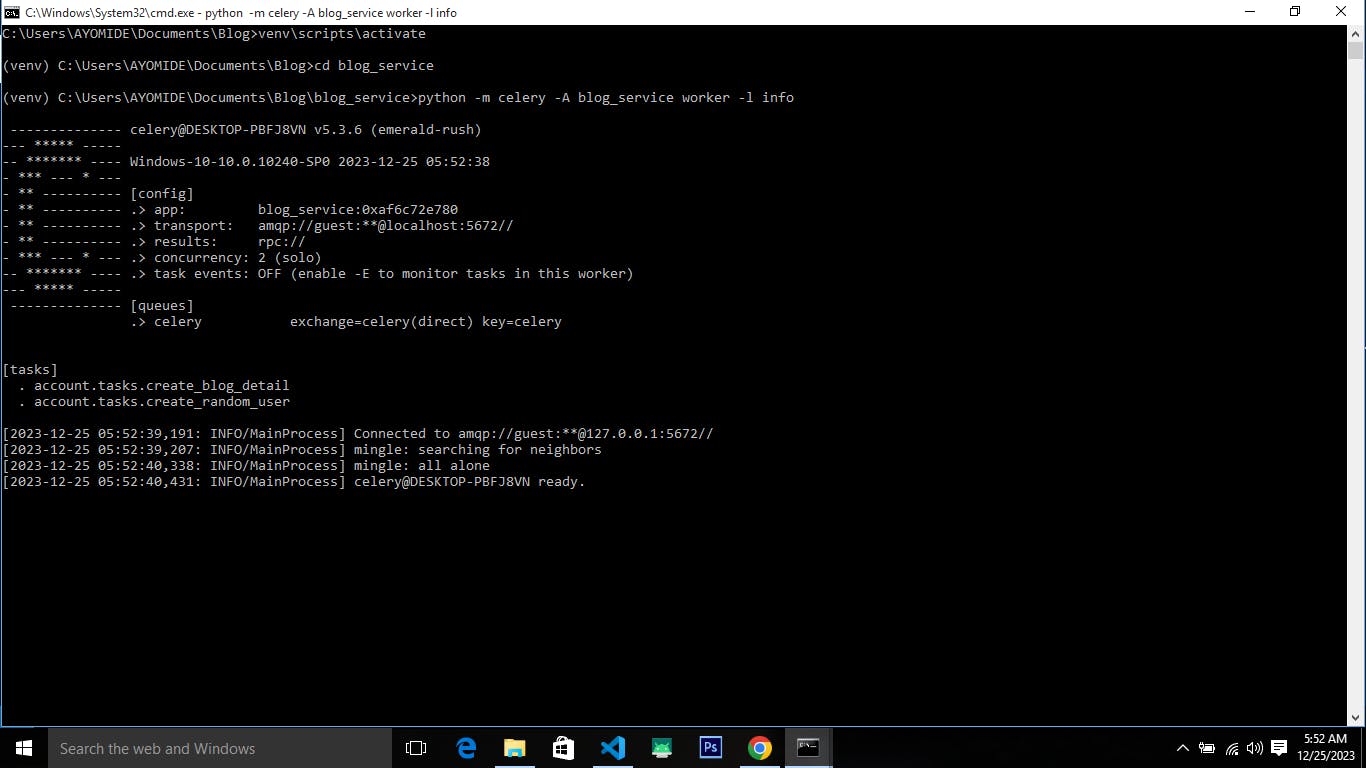
The command
python -m celery -A blog_service worker -l infostarts the Celery worker for the blog_service project, which will process and execute tasks that are sent to the Celery message broker. Make sure that the Celery application and configuration are correctly set up before running this command. You can see here that Celery automatically discovered the task you created in tasks.py, rememberapp.autodiscover_tasks()from celery.py file.Now start the FlowerUI server to monitor task execution.
Open another command prompt tab and start the Flower server. To start the Flower server, you need to activate venv:

The command
python -m celery blog_service floweris used to launch Flower, a real-time web-based monitoring tool for Celery. Make sure that your Celery application and configuration are correctly setup before running Flower. Once Flower is running, you can access its web-based dashboard by default at localhost:5555.Now let's call the API endpoints to initialize the asynchronous tasks, this can be done from Postman or SwaggerUI. localhost:8000/api/v1/accounts/account/signup, the request body to this endpoint is as follow:
  {
    "first_name": "Ayomide",
    "last_name": "Olusola",
    "email": "ayomideolusola5002@gmail.com",
    "password": "Ayomide5002",
    "password2": "Ayomide5002"
  }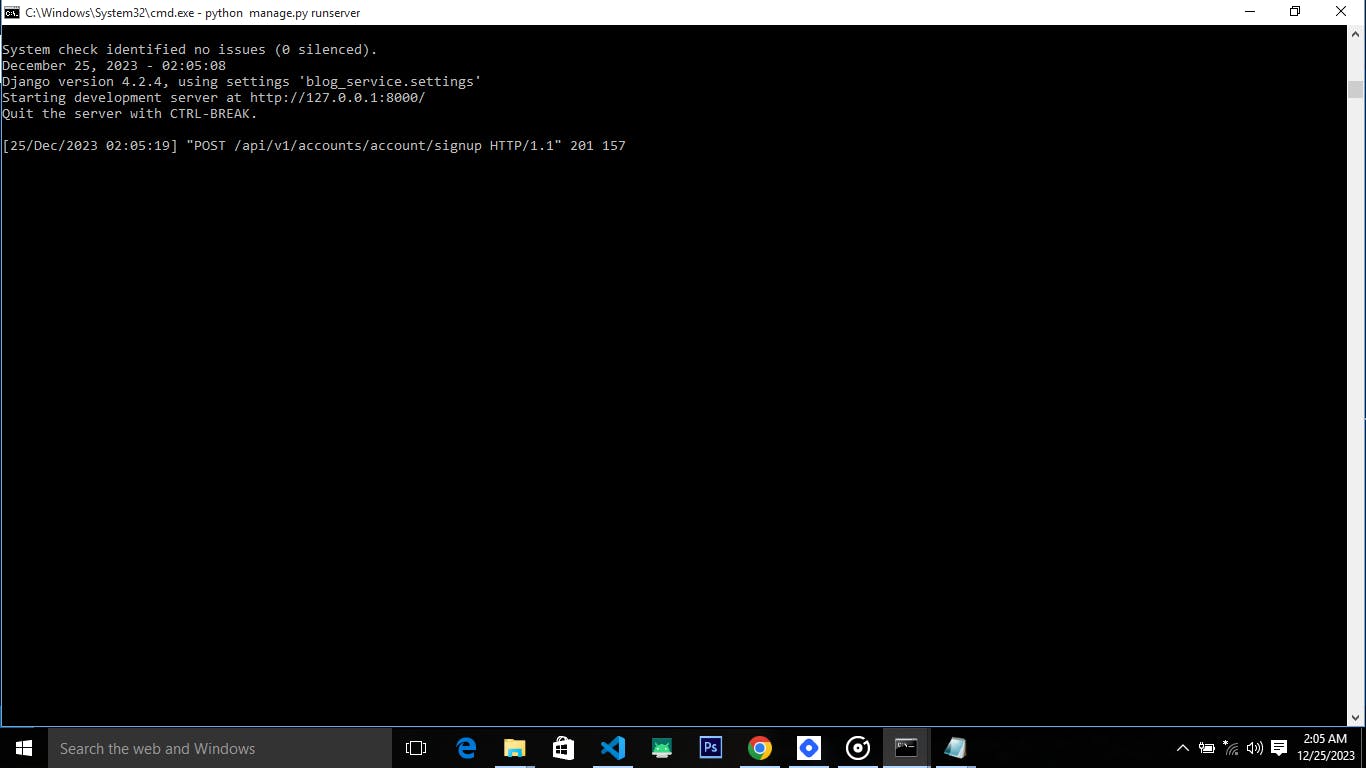
Here the API call to the signup end point is made, returning a status code 201, which means the process is successful.

Here Celery received the task and execute it. The executed task is to create a BlogDetail instance for every user that registers successfully.

Here is Flower UI, which indicates that the task is successfully executed.
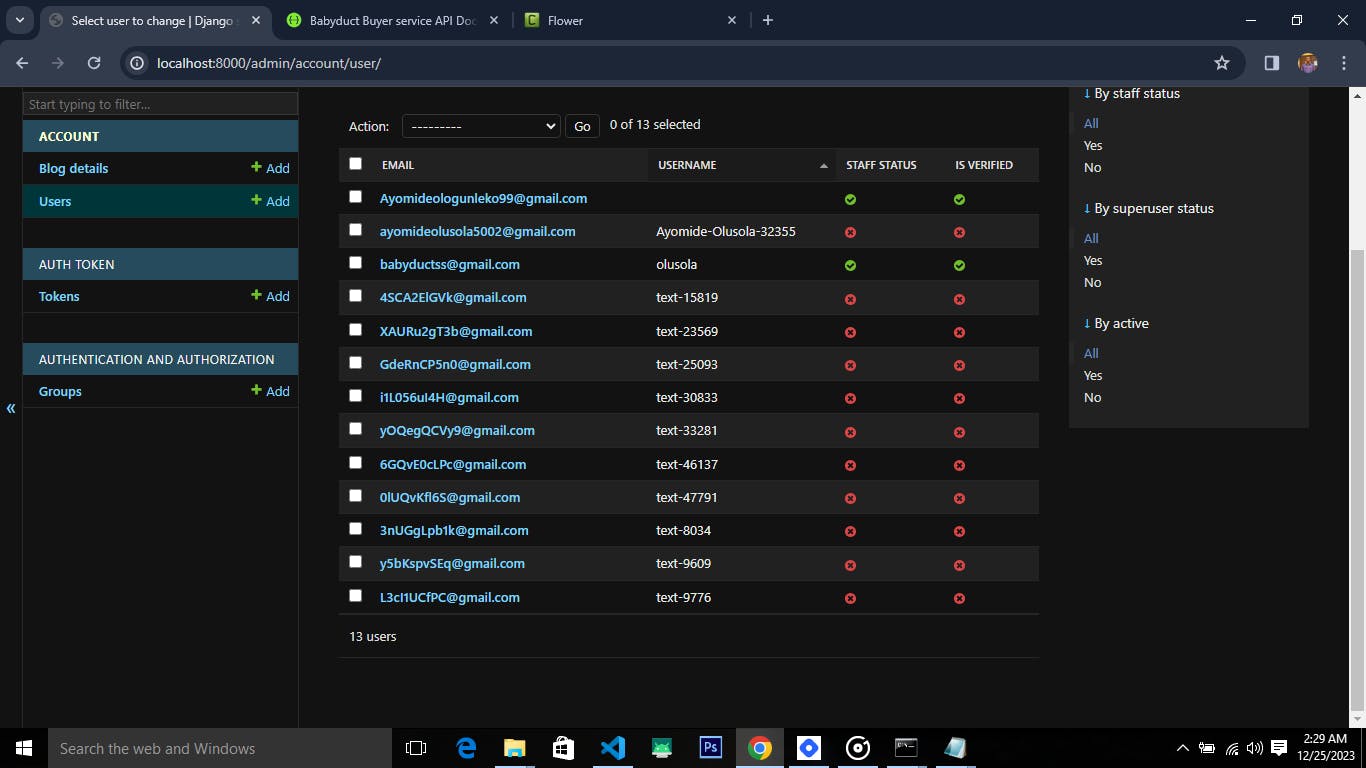
Now let's check out admin interface to confirm if a BlogDetail instance has been created.

Tada! the asynchronous request has been processed and executed successfully.
Now let us make an API call to the next endpoint, localhost:8000/api/v1/accounts/account/random-user, the request body to this endpoint is as follow:
  {
    "amount": 10
  }
If the request is successful, celery will process this task asynchronously, generating 10 random user successfully without delaying the request-response cycle. Let's check the admin interface to validate if the random users are successfully generated, you can do well to check the FlowerUI.
In this blog post, we've navigated through the essential steps of setting up Celery for background task processing in a Django project. From configuring Celery and choosing a message broker to defining and executing tasks asynchronously, you've gained insights into optimizing your Django application for efficient background processing.
KEY TAKEAWAYS
Celery Configuration: Understand the importance of configuring Celery in Django project, including the creation of a Celery instance and setting up the message broker.
Task Definition: Learn how to define Celery tasks using the @shared_task decorator, making them shareable and reusable across different apps.
Background Worker: Explore the process of launching a Celery worker, responsible for processing asynchronous tasks efficiently.
Flower Monitoring: Enhance your development experience by integrating Flower, a real-time monitoring tool, to gain insights into Celery worker activities.
As you embark on incorporating Celery into your projects, keep in mind the flexibility and scalability it offers for handling background tasks. Whether it's sending emails, processing data, or handling periodic tasks, Celery equips your Django applications with the power of asynchronous task execution.
Remember to adapt the configurations and setups based on your project's specific requirements and scalability needs. Feel free to experiment with additional Celery features, such as result backend, periodic tasks, and more, to unlock the full potential of background task processing in Django.
Thank you for joining us on this journey through Celery in Django. Don't forget to subscribe to my Newsletter. Happy coding!